
Arduino IDE
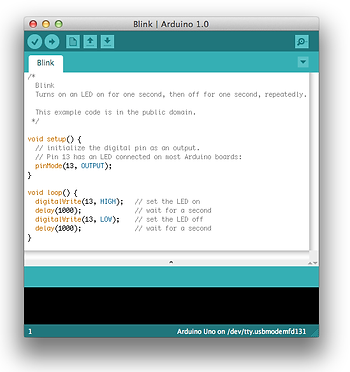
The Arduino IDE (or Integrated Development Environment) is the program on your computer that you use to compose and upload programs to your Arduino microcontroller board. It uses a language derived from C, however it is not necessary to have programmed C in order to use it. The Arduino website has tons of resources for learning how to program, however probably the best way to learn is to start working through some of the example code (under File>Examples in the Arduino IDE file menu).
Here is a brief introduction though, highlighting a few issues that I have found useful.
An Arduino program is composed of three basic parts: an intro section where global variables and libraries are declared and initialized, a setup section which runs once and sets up particular hardware features on the chip (e.g. whether digital pins are input or outputs), and a loop section that loops through all of your commands as quickly as possible, basically ad infinitum.
Here are a few notes on these sections:
Initial section:
Here you will declare and initialize most of your variables, as well as any libraries (packages that other people have written that perform particular cunctions, like running stepper motors ) that you may end up using. Usually I make most of my variables global, which means that you can write subfunctions that modify these (e.g. if you write a subfunction that checks a lever state) and the changes will be read in the main program. Most of your variables will be integers (or "int"), however keep in mind that if these variables are for times, you may need to make them "long" or else you might overrun the size of an 8 bit number, since the arduino times are in milliseconds.
Setup:
Setup is where you use the "pinMode" command to specify the state of any digital pins that you use as INPUT or OUTPUT (you don't need to do this for the analog inputs). Note that you can also enable pullup resistors on the digital inputs, which you will need to do in order to use some of the OpenMaze features. This is also where you instantiate libraries and set basic settings for them (e.g. Serial.begin(9600); starts a serial connection with the computer for transferring data from the Arduino, at a rate of 9600 baud). You can also use this section to set initial states of certain pins, or to print out some lines of text as a header specifying the values of particular variables that might help later interpret the data (e.g. the lengths of trials or ITIs, etc.).
Loop:
This section is where all the magic happens. All of the code within the loop section executes again and again as quickly as possible . I should note that there are several general philosophies to writing code in this section, the hierarchical loop, and the state machine. Basically the hierarchical loop uses delays to organize timing, whereas the state machine runs through the loop very quickly and updates the states of variables in each loop iteration. Delays are more accurate in terms of absolute time, but nothing else can occur during a delay (except for servicing interrupts potentially), so if you have a lot of things you want to be happening at the same time then use a state machine design.